<?xml version="1.0" encoding="utf-8"?><feed xmlns="http://www.w3.org/2005/Atom" ><generator uri="https://jekyllrb.com/" version="3.10.0">Jekyll</generator><link href="/feed.xml" rel="self" type="application/atom+xml" /><link href="/" rel="alternate" type="text/html" /><updated>2026-04-16T13:35:51+00:00</updated><id>/feed.xml</id><title type="html">Alexandros Goulielmos</title><subtitle>Alexandros Goulielmos - Senior Software Engineer</subtitle><entry><title type="html">Debugging a Sportsbook Integration: Four Bugs, One Database Session</title><link href="/concurrency/2026/04/05/debugging-sportsbook-integration-four-bugs-one-session.html" rel="alternate" type="text/html" title="Debugging a Sportsbook Integration: Four Bugs, One Database Session" /><published>2026-04-05T13:21:59+00:00</published><updated>2026-04-05T13:21:59+00:00</updated><id>/concurrency/2026/04/05/debugging-sportsbook-integration-four-bugs-one-session</id><content type="html" xml:base="/concurrency/2026/04/05/debugging-sportsbook-integration-four-bugs-one-session.html"><![CDATA[<p>We recently went through a full audit of our sportsbook callback integration - the server-side endpoints that the provider calls when a player places a bet, wins, loses, or gets a refund. What started as a single bug report from the provider, turned into a deep dive through race conditions, SQLAlchemy session mechanics, and the subtle cost of committing too often in an async Python application.</p>

<p>This is a walkthrough of every bug we found and fixed, roughly in the order we found them.</p>

<h2 id="the-setup">The Setup</h2>
<p>When a player places a bet, the provider sends a signed JWT callback to our server. Our server deducts the balance, records the transaction, and returns the updated balance. There are about a dozen callback endpoints: <code class="language-plaintext highlighter-rouge">bet/make</code>, <code class="language-plaintext highlighter-rouge">bet/win</code>, <code class="language-plaintext highlighter-rouge">bet/refund</code>, <code class="language-plaintext highlighter-rouge">bet/rollback</code>, <code class="language-plaintext highlighter-rouge">bet/discard</code>, <code class="language-plaintext highlighter-rouge">ping</code>, <code class="language-plaintext highlighter-rouge">balance</code>, and more.</p>

<p>The stack: FastAPI (async), SQLAlchemy (synchronous ORM with <code class="language-plaintext highlighter-rouge">autoflush=False</code>), PostgreSQL, a shared <code class="language-plaintext highlighter-rouge">get_db</code> dependency that yields a fresh <code class="language-plaintext highlighter-rouge">SessionLocal()</code> per request and commits on success / rolls back on exception.</p>

<h2 id="bug-1-five-parallel-bets-timing-out">Bug 1: Five parallel bets timing out</h2>
<p>The provider’s test suite includes a test that fires five bet/make requests concurrently. Ours was timing out.</p>

<p>The culprit: <code class="language-plaintext highlighter-rouge">create_single_bet</code> was calling <code class="language-plaintext highlighter-rouge">db.commit()</code> after inserting each individual SingleBet. For a betslip with three selections, that meant three commits before the betslip itself was committed. SQLAlchemy’s synchronous <code class="language-plaintext highlighter-rouge">commit()</code> blocks the event loop for the duration of the round trip to PostgreSQL. Five concurrent requests x four commits each = twenty sequential event-loop blocks happening in what should have been parallel processing.</p>

<p>The fix: remove the commits from <code class="language-plaintext highlighter-rouge">create_single_bet</code>. Instead, stage the <code class="language-plaintext highlighter-rouge">SingleBet</code> objects with <code class="language-plaintext highlighter-rouge">db.add()</code> and let <code class="language-plaintext highlighter-rouge">create_bet_slip</code>’s existing final commit write everything in one shot.</p>
<div class="language-plaintext highlighter-rouge"><div class="highlight"><pre class="highlight"><code># Before: 4 commits per bet (N selections + 1 betslip)
def create_single_bet(db, bet, ...):
    db_bet = SingleBet(...)
    db.add(db_bet)
    db.commit()       # &lt;- blocking, per-selection
    db.refresh(db_bet)
    return db_bet

# After: 1 commit for everything
def create_single_bet(db, bet, ...):
    db_bet = SingleBet(...)
    db.add(db_bet)
    return db_bet     # committed later by create_bet_slip
</code></pre></div></div>
<h2 id="bug-2-twenty-parallel-bets-timing-out">Bug 2: Twenty parallel bets timing out</h2>
<p>After fixing the five-parallel test, the twenty-parallel test started timing out. The five-parallel fix reduced commits per request, but there were still five commits in the <code class="language-plaintext highlighter-rouge">bet/make</code> path overall:</p>

<ol>
  <li>Reference entity creation (<code class="language-plaintext highlighter-rouge">create_sport</code>, <code class="language-plaintext highlighter-rouge">create_tournament</code>, etc.) - one commit each if the entity was new</li>
  <li><code class="language-plaintext highlighter-rouge">create_bet_slip</code> - one commit</li>
  <li><code class="language-plaintext highlighter-rouge">update_user_finance_and_transaction</code> - one commit (unavoidable - shared function)</li>
  <li><code class="language-plaintext highlighter-rouge">create_transaction</code> inside finance - one commit (unavoidable)</li>
  <li><code class="language-plaintext highlighter-rouge">SportsbookTransaction</code> - one commit</li>
  <li><code class="language-plaintext highlighter-rouge">Bet</code> model - one commit</li>
</ol>

<p>We reduced this to two unavoidable commits by changing the <code class="language-plaintext highlighter-rouge">SportsbookTransaction</code> insert to a <code class="language-plaintext highlighter-rouge">flush</code> (which assigns the auto-increment ID without committing) and deferring the <code class="language-plaintext highlighter-rouge">Bet</code> insert to the <code class="language-plaintext highlighter-rouge">get_db</code> dependency’s final commit at request teardown:</p>
<div class="language-plaintext highlighter-rouge"><div class="highlight"><pre class="highlight"><code># SportsbookTransaction: flush instead of commit
db.add(sportsbook_transaction_model)
db.flush()           # &lt;- ID assigned, not yet committed
db.refresh(sportsbook_transaction_model)

# Bet model: stage only, committed by get_db
db.add(bet_model)
# no commit here - get_db commits on response 
</code></pre></div></div>
<p>The two remaining commits - finance update and <code class="language-plaintext highlighter-rouge">create_transaction</code> - live in a shared service used across the whole platform, so we left them alone.</p>

<h2 id="bug-3-the-race-condition-we-found-along-the-way">Bug 3: The Race Condition We Found Along the Way</h2>
<p>While fixing the parallel bet timeouts, we noticed that some bets were failing intermittently - not with a timeout, but with HTTP 500 errors. This only happened when the reference tables (sports, tournaments, categories) were empty, i.e., on a fresh database or after clearing data between test runs.</p>

<p>The root cause was a classic check-then-insert race:</p>
<div class="language-plaintext highlighter-rouge"><div class="highlight"><pre class="highlight"><code>def create_sport(db, bet):
    existing = db.query(Sport).filter(Sport.id == bet.sport_id).first()
    if existing is None:
        sport = Sport(id=bet.sport_id, name=bet.sport_name)
        db.add(sport)
        db.commit()   # &lt;- crash if another session commits the same PK first 
</code></pre></div></div>
<p>With requests arriving simultaneously, all sessions query sports at the same instant, all find nothing, and all attempt to insert the same row (same sport ID as primary key). The first one to commit wins, and the others get PostgreSQL’s duplicate key value violates unique constraint -&gt; <code class="language-plaintext highlighter-rouge">IntegrityError</code> -&gt; HTTP 500.</p>

<p>The fix was to replace the check-then-insert pattern with PostgreSQL’s <code class="language-plaintext highlighter-rouge">INSERT ... ON CONFLICT DO NOTHING</code>, executed directly within the current session’s open transaction - no separate commit needed:</p>
<div class="language-plaintext highlighter-rouge"><div class="highlight"><pre class="highlight"><code>from sqlalchemy.dialects.postgresql import insert as pg_insert

def create_sport(db, bet):
    stmt = pg_insert(Sport.__table__).values(
        id=bet.sport_id,
        name=bet.sport_name,
        created_at=datetime.utcnow(),
        updated_at=datetime.utcnow(),
    ).on_conflict_do_nothing(index_elements=['id'])
    db.execute(stmt)
    # no commit - everything committed by create_bet_slip at the end 
</code></pre></div></div>
<p>PostgreSQL serializes concurrent inserts of the same key at the database level: the second session to arrive blocks briefly until the first commits, then silently skips the insert. No application-level errors, no individual commits per entity.</p>

<h2 id="bug-4-deadlocks-and-stale-data">Bug 4: Deadlocks and Stale Data</h2>
<p>In a sportsbook integration, a single “Bet Make” request often needs to update multiple tables: user finance, transaction history, and betslip details. Our original code used standard SQLAlchemy <code class="language-plaintext highlighter-rouge">SELECT ... FOR UPDATE</code> patterns within a single transaction.</p>

<p>Under parallel load, this created two critical issues:</p>

<p>When multiple bets for the same user arrived simultaneously, they queued up waiting for the finance row lock.
In our async server, any await (like publishing an event to a message broker) yields the event loop. If a request held a lock and then yielded, a competing request could block the entire event loop while waiting for that lock, preventing the first request from ever resuming to release it.</p>

<p>Fix: We introduced explicit commits immediately after critical financial operations and before any asynchronous calls (like <code class="language-plaintext highlighter-rouge">await publish_event</code>).</p>

<h2 id="what-we-learned">What We Learned</h2>
<ol>
  <li>SQLAlchemy’s <code class="language-plaintext highlighter-rouge">with_for_update()</code> is necessary but not sufficient. We use it to serialize concurrent balance deductions - it’s a <code class="language-plaintext highlighter-rouge">SELECT ... FOR UPDATE</code> that locks the user’s finance row so only one request at a time can read-and-modify the balance. But that lock only helps for the finance update. Reference table inserts need their own concurrency strategy, which is where <code class="language-plaintext highlighter-rouge">ON CONFLICT DO NOTHING</code> fits.</li>
  <li>Committing inside a helper function is a trap. Every <code class="language-plaintext highlighter-rouge">db.commit()</code> inside a function that’s called from a request handler has two costs: it blocks the event loop (SQLAlchemy is synchronous; <code class="language-plaintext highlighter-rouge">commit()</code> is a network round trip to PostgreSQL), and it commits everything currently staged in the session - including objects staged by callers that weren’t expecting them to be committed yet. The right pattern is to stage everything with <code class="language-plaintext highlighter-rouge">db.add()</code> or <code class="language-plaintext highlighter-rouge">db.flush()</code> (for ID generation) and commit once at the handler’s exit point.</li>
  <li>The <code class="language-plaintext highlighter-rouge">get_db</code> dependency is a natural commit point. FastAPI’s dependency injection system calls <code class="language-plaintext highlighter-rouge">get_db</code>’s <code class="language-plaintext highlighter-rouge">finally</code> block after the response is sent. Deferring the final commit there means the DB transaction stays open as short as possible (only while the response is being prepared), and any unhandled exception automatically triggers a rollback.</li>
  <li>Flush is your friend for ID generation. <code class="language-plaintext highlighter-rouge">db.flush()</code> sends the INSERT to PostgreSQL within the open transaction, which means PostgreSQL assigns the auto-increment primary key, but the row isn’t visible to other sessions yet. You get the ID you need for foreign keys without paying for a commit.</li>
  <li>Locks vs. Awaits. Never hold a row lock while the event loop can yield. Committing early releases these locks, allowing parallel requests for the same user to proceed while the first request handles non-critical secondary logic.</li>
</ol>

<h2 id="testing-parallel-behavior">Testing Parallel Behavior</h2>
<p>To reproduce and verify these fixes, we wrote a parallel load test script (<code class="language-plaintext highlighter-rouge">test/parallel_test.py</code>) that generates RSA-signed JWT payloads simulating the provider’s callback format and fires N concurrent requests using asyncio.gather. Key design decisions:</p>
<ul>
  <li>All request bodies are built before the concurrent phase starts, so JWT signing time doesn’t skew the latency measurements.</li>
  <li>The script generates a throwaway RSA key pair and prints the public key so you can paste it into the development config’s <code class="language-plaintext highlighter-rouge">PUBLIC_KEY</code> for that test run.</li>
</ul>

<p>After all fixes: 20/20 requests succeed, wall time well under the timeout threshold.</p>]]></content><author><name></name></author><category term="concurrency" /><summary type="html"><![CDATA[We recently went through a full audit of our sportsbook callback integration - the server-side endpoints that the provider calls when a player places a bet, wins, loses, or gets a refund. What started as a single bug report from the provider, turned into a deep dive through race conditions, SQLAlchemy session mechanics, and the subtle cost of committing too often in an async Python application.]]></summary></entry><entry><title type="html">Mastering Python Containers: A Tale of Two Fixes</title><link href="/docker/2026/03/07/mastering-python-containers-tale-two-fixes.html" rel="alternate" type="text/html" title="Mastering Python Containers: A Tale of Two Fixes" /><published>2026-03-07T13:21:59+00:00</published><updated>2026-03-07T13:21:59+00:00</updated><id>/docker/2026/03/07/mastering-python-containers-tale-two-fixes</id><content type="html" xml:base="/docker/2026/03/07/mastering-python-containers-tale-two-fixes.html"><![CDATA[<p>Moving a FastAPI stack from a standard Dockerfile to a high-performance <code class="language-plaintext highlighter-rouge">uv</code> build isn’t just about speed—it’s about avoiding the “Bloated Image” and the “Broken Path” traps. Here is how we solved both.</p>

<h2 id="part-1-the-size-battle-from-1gb-to-350mb">Part 1: The Size Battle (From 1GB to 350MB)</h2>

<p>Most Python images are bloated because they treat the container like a virtual machine rather than a specialized runtime. We achieved a 65% reduction in size using three specific tactics:</p>

<ol>
  <li>The Multi-Stage “Surgical” Copy</li>
</ol>

<p>In a single-stage build, your image keeps every tool used to compile dependencies (like <code class="language-plaintext highlighter-rouge">gcc</code>, <code class="language-plaintext highlighter-rouge">g++</code>, and <code class="language-plaintext highlighter-rouge">python3-dev</code>). These are massive.</p>

<p>Fix: Build everything in a builder stage, then copy only the resulting virtual environment into a clean runtime stage.</p>

<ol>
  <li>Selective Shared Libraries</li>
</ol>

<p>You don’t need a compiler to run Python, but you do need the shared libraries that C-extensions (like <code class="language-plaintext highlighter-rouge">psycopg2</code> or <code class="language-plaintext highlighter-rouge">cryptography</code>) link to. Instead of installing full development headers in the final image, we only install the lightweight runtime versions: <code class="language-plaintext highlighter-rouge">libpq</code>, <code class="language-plaintext highlighter-rouge">libstdc++</code>, and <code class="language-plaintext highlighter-rouge">openssl</code>.</p>

<ol>
  <li>The <code class="language-plaintext highlighter-rouge">.dockerignore</code> Guard</li>
</ol>

<p>The most common cause of 1GB images? Running <code class="language-plaintext highlighter-rouge">COPY . .</code> and accidentally pulling in your local <code class="language-plaintext highlighter-rouge">.venv</code>, <code class="language-plaintext highlighter-rouge">.git</code> folder, and <code class="language-plaintext highlighter-rouge">pycache</code>.</p>

<p>Fix: A strict <code class="language-plaintext highlighter-rouge">.dockerignore</code> ensures that the only environment inside the container is the one built specifically for the container.</p>

<h2 id="part-2-the-hardcoded-shebang-fixing-file-not-found">Part 2: The Hardcoded Shebang (Fixing “File Not Found”)</h2>

<p>Even with a small image, you might encounter a confusing error:</p>
<div class="language-plaintext highlighter-rouge"><div class="highlight"><pre class="highlight"><code>bash: /opt/venv/bin/&lt;binary&gt;: cannot execute: required file not found
</code></pre></div></div>
<h3 id="the-ghost-path-problem">The “Ghost” Path Problem</h3>

<p>When uv or pip installs a package like Gunicorn, it creates an executable script. The very first line of that script (the Shebang) points to the absolute path of the Python interpreter used during installation.</p>

<p>If you build in <code class="language-plaintext highlighter-rouge">/build/.venv</code> but move it to <code class="language-plaintext highlighter-rouge">/opt/venv</code> for production, Gunicorn will still try to find Python at <code class="language-plaintext highlighter-rouge">/build/...</code>. Because that folder doesn’t exist in the final stage, you get a “file not found” error.</p>

<h3 id="the-fix-path-matching">The Fix: Path-Matching</h3>

<p>The solution is to ensure the Builder and Runtime stages use the exact same directory structure. By setting <code class="language-plaintext highlighter-rouge">WORKDIR /opt/venv</code> in both stages, the internal paths created by uv remain valid when the environment is moved.</p>
<div class="language-plaintext highlighter-rouge"><div class="highlight"><pre class="highlight"><code>Dockerfile

# Builder: Build in the final destination
WORKDIR /opt/venv
RUN uv sync --frozen ...

# Runtime: Copy to the exact same path
COPY --from=builder /opt/venv/.venv /opt/venv
ENV PATH="/opt/venv/bin:$PATH"
</code></pre></div></div>
<h3 id="the-result">The Result</h3>
<p>By combining uv’s speed with multi-stage path matching, we ended up with an image that is:</p>
<ul>
  <li>Reproducible: <code class="language-plaintext highlighter-rouge">uv.lock</code> ensures zero dependency drift.</li>
  <li>Tiny: Alpine-based with zero build-tool bloat.</li>
  <li>Functional: No broken shebangs or missing shared libraries.</li>
</ul>]]></content><author><name></name></author><category term="docker" /><summary type="html"><![CDATA[Moving a FastAPI stack from a standard Dockerfile to a high-performance uv build isn’t just about speed—it’s about avoiding the “Bloated Image” and the “Broken Path” traps. Here is how we solved both.]]></summary></entry><entry><title type="html">How to integrate LDAP authentication in your Flask backend</title><link href="/flask/2024/03/10/how-integrate-ldap-authentication-your-flask-backend.html" rel="alternate" type="text/html" title="How to integrate LDAP authentication in your Flask backend" /><published>2024-03-10T13:21:59+00:00</published><updated>2024-03-10T13:21:59+00:00</updated><id>/flask/2024/03/10/how-integrate-ldap-authentication-your-flask-backend</id><content type="html" xml:base="/flask/2024/03/10/how-integrate-ldap-authentication-your-flask-backend.html"><![CDATA[<p>I have used various web frameworks (mostly React and Django). When it comes to backend technologies, I usually prefer C# and .NET solutions. However, if I want to develop a web API quickly (for example to support a mobile app), then it’s difficult to beat Flask. For cases like this, I had to find the easiest way to integrate LDAP authentication in Flask.</p>

<p>Let’s explore the problem by first installing a sample OpenLDAP server. The best way to do this is of course using Docker. Make sure you have Docker Desktop installed, and then execute the following:</p>
<div class="language-plaintext highlighter-rouge"><div class="highlight"><pre class="highlight"><code>docker run -p 389:389 -p 636:636 --name my-openldap-container --detach osixia/openldap:1.2.4
</code></pre></div></div>
<p>This will install a basic OpenLDAP server, which will contain a domain <code class="language-plaintext highlighter-rouge">example.org</code> along with a user named <code class="language-plaintext highlighter-rouge">admin</code> (with same password). Go ahead and test the server by executing the following:</p>
<div class="language-plaintext highlighter-rouge"><div class="highlight"><pre class="highlight"><code>docker exec my-openldap-container ldapsearch -x -b dc=example,dc=org -D "cn=admin,dc=example,dc=org" -w admin
</code></pre></div></div>
<p>You can execute commands inside the OpenLDAP container by running the below:</p>
<div class="language-plaintext highlighter-rouge"><div class="highlight"><pre class="highlight"><code>docker exec -it my-openldap-container sh
</code></pre></div></div>
<p>At this point, you can add another password-protected user:</p>
<div class="language-plaintext highlighter-rouge"><div class="highlight"><pre class="highlight"><code>echo "dn: cn=alex,dc=example,dc=org
objectClass: person
cn: alex
sn: goulielmos" &gt; entry.txt

ldapadd -D "cn=admin,dc=example,dc=org" -w admin -f entry.txt

ldappasswd -s welcome123 -D "cn=admin,dc=example,dc=org" -w admin -x "cn=alex,dc=example,dc=org"
</code></pre></div></div>
<p>Now we are ready to create a basic Flask application and integrate LDAP authentication. Let’s try the proposed solution first, which is to install the <code class="language-plaintext highlighter-rouge">flask-ldap3-login</code> package:</p>
<div class="language-plaintext highlighter-rouge"><div class="highlight"><pre class="highlight"><code>mkdir flask_test
cd flask_test
python3 -m venv .venv
source .venv/bin/activate
pip install flask-ldap3-login
</code></pre></div></div>
<p>Note that the last command will also install the latest version of Flask automatically, which at the time of writing is 3.0.2. But here is where the problems start. Fire up a Python interpreter and try out your newly-installed package:</p>
<div class="language-plaintext highlighter-rouge"><div class="highlight"><pre class="highlight"><code>&gt;&gt;&gt; from flask_ldap3_login import LDAP3LoginManager

Traceback (most recent call last):
  File "/Users/agou/Desktop/flask_test/.venv/lib/python3.12/site-packages/flask_ldap3_login/__init__.py", line 6, in &lt;module&gt;
    from flask import appctx_stack as stack
ImportError: cannot import name '_app_ctx_stack' from 'flask'
</code></pre></div></div>
<p>Yikes! It seems that <code class="language-plaintext highlighter-rouge">flask_ldap3_login</code> is not compatible with the latest version of Flask. To fix this, quit the interpreter and execute the below:</p>
<div class="language-plaintext highlighter-rouge"><div class="highlight"><pre class="highlight"><code>pip install flask==2.2.0
pip install werkzeug==2.2.0
</code></pre></div></div>
<p>Now the package works. Let’s try it again, according to the instructions of the official documentation:</p>
<div class="language-plaintext highlighter-rouge"><div class="highlight"><pre class="highlight"><code>from flask_ldap3_login import LDAP3LoginManager
config = dict()
config['LDAP_HOST'] = 'localhost'
config['LDAP_BASE_DN'] = 'dc=example,dc=org'
config['LDAP_BIND_USER_DN'] = ''         # or None or 'admin'
config['LDAP_BIND_USER_PASSWORD'] = ''   # or None or 'admin'
ldap_manager = LDAP3LoginManager()
ldap_manager.init_config(config)
response = ldap_manager.authenticate('alex', 'welcome123')
print(response.status)
</code></pre></div></div>
<p>Unfortunately, the authentication always fails for some reason, no matter the combination of <code class="language-plaintext highlighter-rouge">BASE_DN</code>, <code class="language-plaintext highlighter-rouge">BIND_USER_DN</code> and <code class="language-plaintext highlighter-rouge">BIND_USER_PASSWORD</code>. If you have any idea why, let me know in the comments.</p>

<p>But then, the epiphany comes: the real power of Flask is that it allows you to use anything; you are not tied to any specific package. So let’s try a different one. Once again, exit the interpreter and execute the below:</p>
<div class="language-plaintext highlighter-rouge"><div class="highlight"><pre class="highlight"><code>pip install python-ldap
The go into Python again to try it:

connect = ldap.initialize('ldap://localhost')
connect.simple_bind_s('cn=admin,dc=example,dc=org', 'admin')
</code></pre></div></div>
<p>Thank God this works! Time to write our Flask app. We just need to exit the interpreter and install one more package:</p>
<div class="language-plaintext highlighter-rouge"><div class="highlight"><pre class="highlight"><code>pip install flask_httpauth
</code></pre></div></div>
<p>Then create the below Flask app using your favorite editor:</p>
<div class="language-plaintext highlighter-rouge"><div class="highlight"><pre class="highlight"><code># myapp.py
from flask import Flask
from flask_httpauth import HTTPBasicAuth
import ldap

app = Flask(__name__)
basic_auth = HTTPBasicAuth()

@basic_auth.verify_password
def verify_password(username, password):
  try:
    connect = ldap.initialize('ldap://localhost')
    connect.simple_bind_s(f'cn={username},dc=example,dc=org', password) # in other cases you might need domain+'\\'+username
    return username
  except:
    pass

@app.route('/myroute', methods=['POST'])
@basic_auth.login_required
def myroute():
  return basic_auth.current_user()
</code></pre></div></div>
<p>This is just a trivial app with only one route. The route is login-protected, and if it’s accessed successfully it just prints the logged-in username.</p>

<p>Let’s run the app:</p>
<div class="language-plaintext highlighter-rouge"><div class="highlight"><pre class="highlight"><code>flask --app myapp run
</code></pre></div></div>
<p>and try it using curl:</p>
<div class="language-plaintext highlighter-rouge"><div class="highlight"><pre class="highlight"><code>curl -u admin:admin -X POST http://127.0.0.1:5000/myroute
</code></pre></div></div>
<p>or with your manually-added credentials:</p>
<div class="language-plaintext highlighter-rouge"><div class="highlight"><pre class="highlight"><code>curl -u alex:welcome123 -X POST http://127.0.0.1:5000/myroute
</code></pre></div></div>
<p>It works in both cases. Enjoy your Flask app with the newly-added LDAP integration!</p>]]></content><author><name></name></author><category term="flask" /><summary type="html"><![CDATA[I have used various web frameworks (mostly React and Django). When it comes to backend technologies, I usually prefer C# and .NET solutions. However, if I want to develop a web API quickly (for example to support a mobile app), then it’s difficult to beat Flask. For cases like this, I had to find the easiest way to integrate LDAP authentication in Flask.]]></summary></entry><entry><title type="html">Django: How to create separate logout pages for the Admin app and your own apps</title><link href="/django/2023/11/09/django-separate-logout-pages.html" rel="alternate" type="text/html" title="Django: How to create separate logout pages for the Admin app and your own apps" /><published>2023-11-09T13:21:59+00:00</published><updated>2023-11-09T13:21:59+00:00</updated><id>/django/2023/11/09/django-separate-logout-pages</id><content type="html" xml:base="/django/2023/11/09/django-separate-logout-pages.html"><![CDATA[<p>As we <a href="http://agouliel.github.io/sharepoint/2022/11/18/how-did-we-make-transition-from-desktop-web.html">discussed before</a>, Django is a powerful framework. We have been using it to quickly develop reliable CRUD web apps that run smoothly and flawlessly. However, apart from creating our own apps and templates, we are also guilty of giving the Admin interface to end-users. Sometimes, we even combine our custom apps and the Admin app in a single project, and users of this project might have access to both types of apps. In these cases, we faced a rather unusual problem of having to provide two different logout pages: one should be custom and the other should be the Admin’s default. Finding how to do it took some time and experimentation, so if you are having the same problem, read on.</p>

<p>First of all, let’s illustrate the issue by creating a new Django project. (The instructions in the first part of the post, have been taken from Will Vincent’s excellent book <a href="https://djangoforprofessionals.com">Django for Professionals</a>.)</p>

<p><code class="language-plaintext highlighter-rouge">mkdir logout_sample</code> <br />
<code class="language-plaintext highlighter-rouge">cd logout_sample</code> <br />
<code class="language-plaintext highlighter-rouge">python3 -m venv .venv</code> <br />
<code class="language-plaintext highlighter-rouge">source .venv/bin/activate</code> <br />
<code class="language-plaintext highlighter-rouge">pip install django</code> #(at the time of writing, this installs version 4.2.7) <br />
<code class="language-plaintext highlighter-rouge">django-admin startproject config .</code> #(don’t forget the dot) <br />
<code class="language-plaintext highlighter-rouge">python3 manage.py migrate</code> <br />
<code class="language-plaintext highlighter-rouge">python3 manage.py createsuperuser</code></p>

<p>At this point, you cun run the project: <code class="language-plaintext highlighter-rouge">python3 manage.py runserver</code> <br />
to check if everything works correctly.</p>

<p>Now, let’s create a <code class="language-plaintext highlighter-rouge">pages</code> app, which will contain our project’s common pages:</p>

<p><code class="language-plaintext highlighter-rouge">python3 manage.py startapp pages</code></p>

<p>Include this app in the settings:</p>

<div class="language-plaintext highlighter-rouge"><div class="highlight"><pre class="highlight"><code># config/settings.py
INSTALLED_APPS = [
    ...
    'django.contrib.staticfiles',

    # Our apps
    'pages',
]
</code></pre></div></div>

<p>Now let’s create some templates. First, modify settings to enable a project-level templates folder:</p>

<div class="language-plaintext highlighter-rouge"><div class="highlight"><pre class="highlight"><code>TEMPLATES = [
  {
  ...
  #'DIRS': [],
  'DIRS': [BASE_DIR / 'templates'],
</code></pre></div></div>

<p>Create the templates folder:</p>

<p><code class="language-plaintext highlighter-rouge">mkdir templates</code></p>

<p>and add your base template, from which every other template will inherit:</p>

<div class="language-plaintext highlighter-rouge"><div class="highlight"><pre class="highlight"><code>&lt;!-- templates/_base.html --&gt;   
&lt;!DOCTYPE html&gt;
&lt;html&gt;
&lt;head&gt;
&lt;meta charset="utf-8"&gt;
&lt;title&gt;{% block title %}Our Site{% endblock title %}&lt;/title&gt;
&lt;/head&gt;
&lt;body&gt;
    &lt;div class="container"&gt;
    {% block content %}
    {% endblock content %}
    &lt;/div&gt;
&lt;/body&gt;
&lt;/html&gt;
</code></pre></div></div>

<p>Now we should create the homepage template, but first add the app’s URLs:</p>

<div class="language-plaintext highlighter-rouge"><div class="highlight"><pre class="highlight"><code># pages/urls.py
from django.urls import path
from .views import HomePageView

urlpatterns = [
    path('', HomePageView.as_view(), name='home'),
]
</code></pre></div></div>

<p>Add a basic view:</p>

<div class="language-plaintext highlighter-rouge"><div class="highlight"><pre class="highlight"><code># pages/views.py
from django.views.generic import TemplateView

class HomePageView(TemplateView):
  template_name = 'home.html'
</code></pre></div></div>

<p>Modify the project’s URLs:</p>

<div class="language-plaintext highlighter-rouge"><div class="highlight"><pre class="highlight"><code># config/urls.py
from django.contrib import admin
from django.urls import path, include

urlpatterns = [
    path('admin/', admin.site.urls),
    path('accounts/', include('django.contrib.auth.urls')),
    path('', include('pages.urls')),
]
</code></pre></div></div>

<p>Note here that we include <code class="language-plaintext highlighter-rouge">django.contrib.auth.urls</code>. If you inspect the relevant Django’s source code, you will see that by doing so, we are actually including the below code:</p>

<div class="language-plaintext highlighter-rouge"><div class="highlight"><pre class="highlight"><code>from django.contrib.auth import views
class LoginView(...): template_name = "registration/login.html"
class LogoutView(...): template_name = "registration/logged_out.html"
path("login/", views.LoginView.as_view(), name="login"),
path("logout/", views.LogoutView.as_view(), name="logout"),
</code></pre></div></div>

<p>This is important knowledge for the next steps.</p>

<p>Finally we can add our homepage template:</p>

<div class="language-plaintext highlighter-rouge"><div class="highlight"><pre class="highlight"><code>&lt;!-- templates/home.html --&gt;
{% extends "_base.html" %}
{% block title %}Home{% endblock title %}
{% block content %}
&lt;h1&gt;This is our home page.&lt;/h1&gt;
{% if user.is_authenticated %}
  &lt;p&gt;Hi {{ user.email }}!&lt;/p&gt;
  &lt;p&gt;&lt;a href="{% url 'logout' %}"&gt;Log Out&lt;/a&gt;&lt;/p&gt;
{% else %}
  &lt;p&gt;You are not logged in&lt;/p&gt;
  &lt;a href="{% url 'login' %}"&gt;Log In&lt;/a&gt;
{% endif %}
{% endblock content %}
</code></pre></div></div>

<p>Now we need our login template. Create the folder that Django expects for it (as we saw above):</p>

<p><code class="language-plaintext highlighter-rouge">mkdir templates/registration</code></p>

<p>and add the login template there:</p>

<div class="language-plaintext highlighter-rouge"><div class="highlight"><pre class="highlight"><code>&lt;!-- templates/registration/login.html --&gt;
{% extends "_base.html" %}
{% block title %}Log In{% endblock title %}
{% block content %}
&lt;h2&gt;Log In&lt;/h2&gt;
&lt;form method="post"&gt;
{% csrf_token %}
{{ form.as_p }}
&lt;button type="submit"&gt;Log In&lt;/button&gt;
&lt;/form&gt;
{% endblock content %}
</code></pre></div></div>

<p>Also add the below line at the end of settings, so you will be redirected to the homepage after login:</p>

<p><code class="language-plaintext highlighter-rouge">LOGIN_REDIRECT_URL = 'home'</code></p>

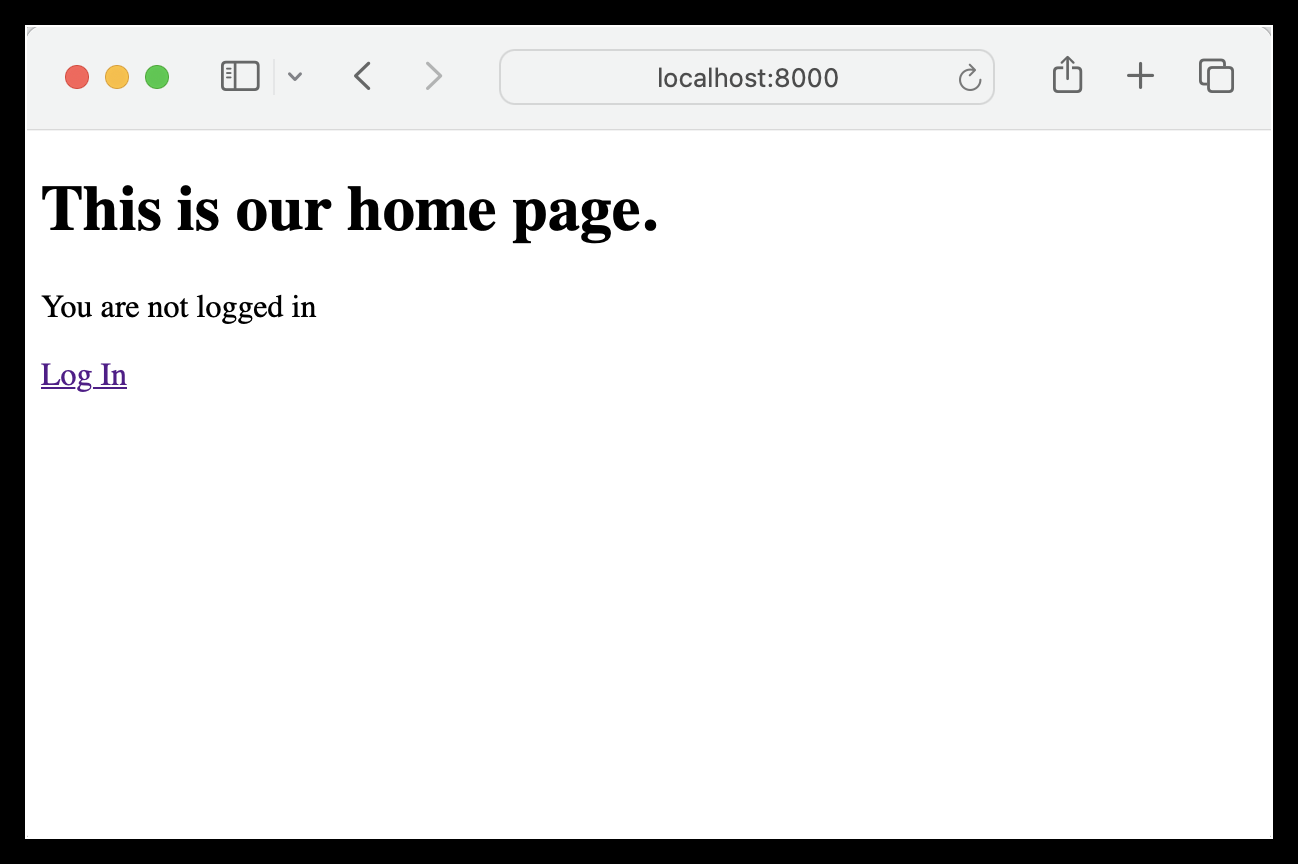
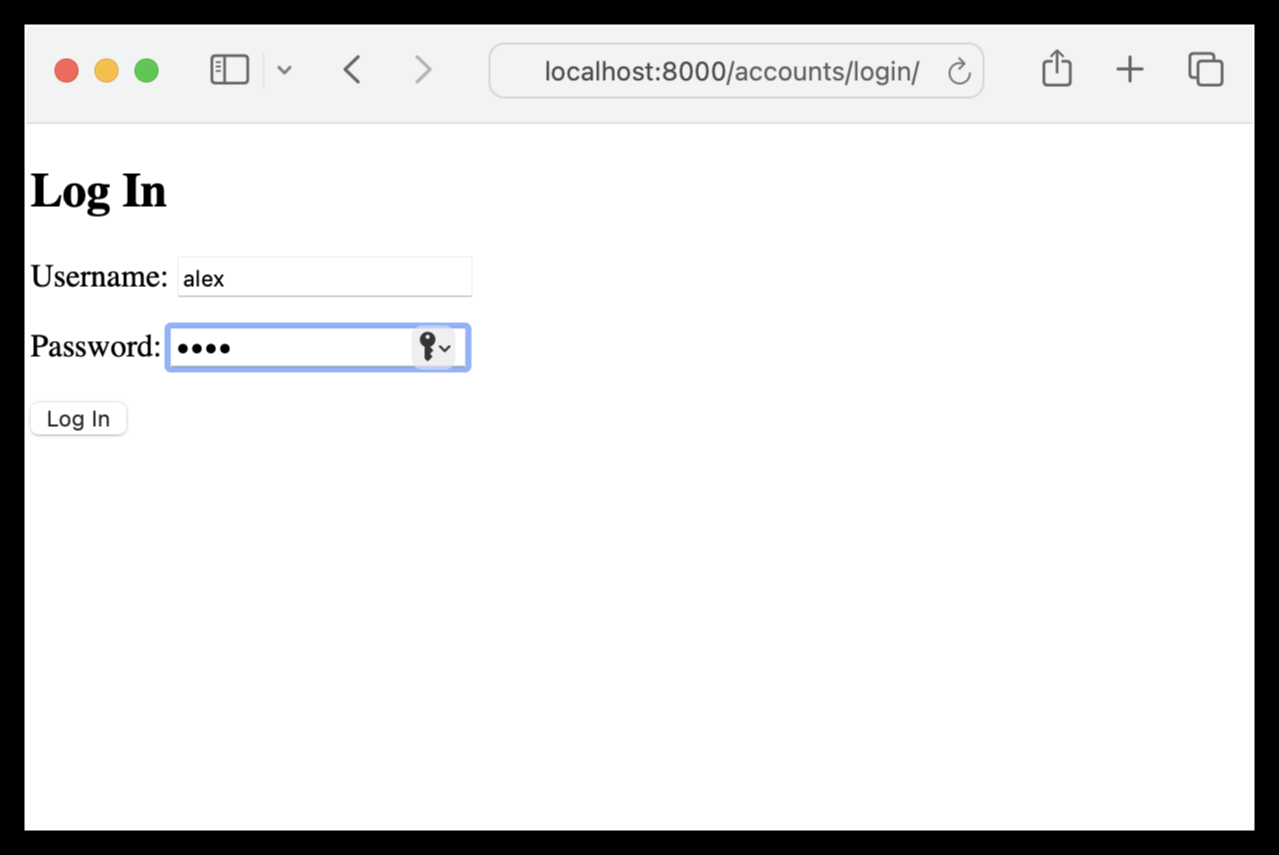
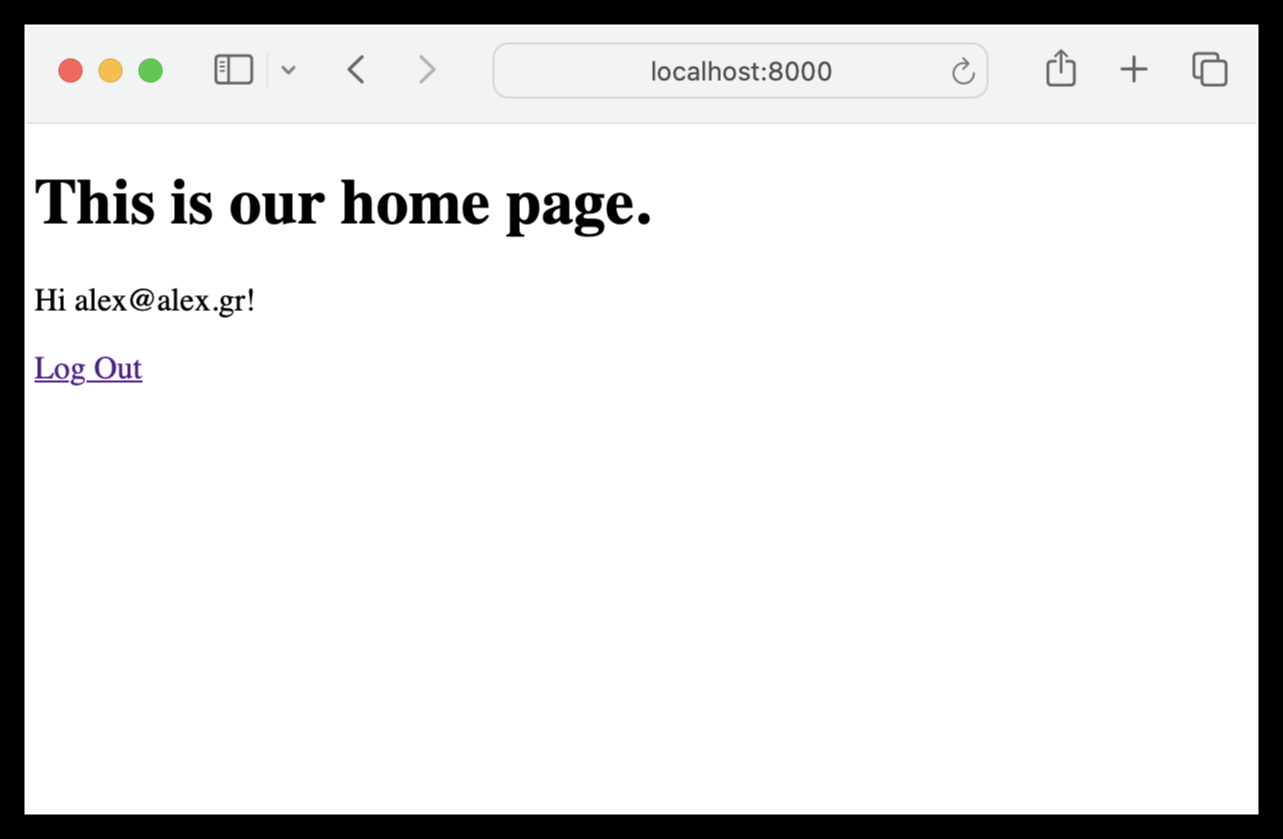
<p>Now we are getting to the meat of things. Run the app, visit <a href="http://localhost:8000">http://localhost:8000</a> and log in:</p>

<p><img src="/docs/assets/1.png" alt="Home page" width="70%" /></p>

<p><img src="/docs/assets/2.png" alt="Log in" width="70%" /></p>

<p><img src="/docs/assets/3.png" alt="Logged in" width="70%" /></p>

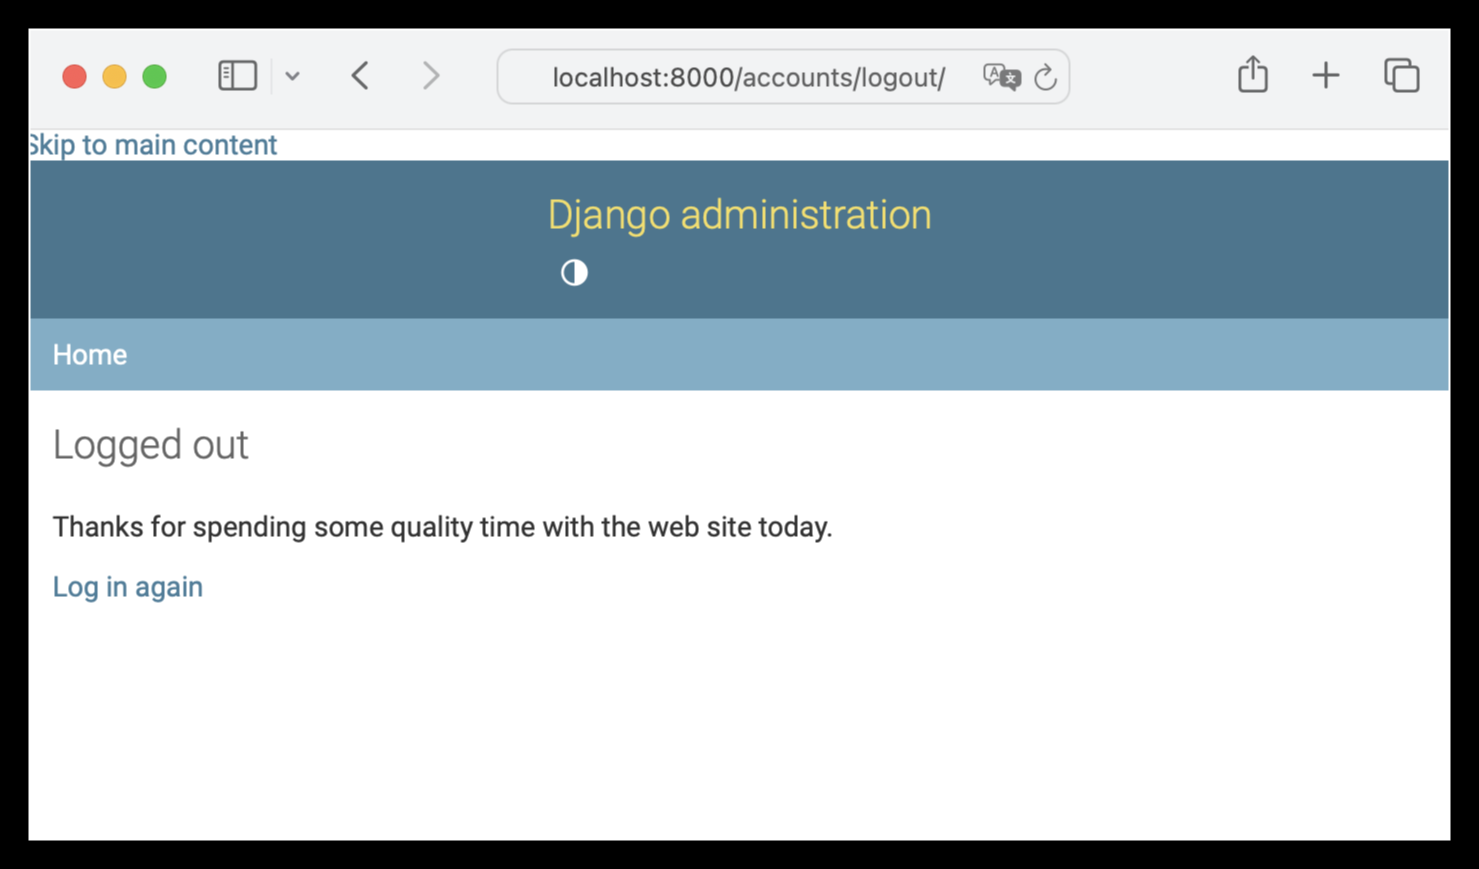
<p>Clicking the logout link of our homepage, we are just redirected to the Admin logout page:</p>

<p><img src="/docs/assets/4.png" alt="Admin logout" width="70%" /></p>

<p>This isn’t optimal, because a user logging out from a custom app will see the different look and feel of the Admin logout page.</p>

<p>Let’s try adding the following line at the end of settings:</p>

<p><code class="language-plaintext highlighter-rouge">LOGOUT_REDIRECT_URL = 'home'</code></p>

<p>This will just redirect a logged out user to the home page. While this works for our custom apps, it isn’t optimal either. First of all, we might want to have a dedicated logout page (not just be redirected to the home page). Second and most important, now we have also lost the Admin logout! Users logging out from the Admin app, will be redirected to the homepage of our custom apps. Not good!</p>

<p>Let’s make a first attempt for a custom logout page. Remove <code class="language-plaintext highlighter-rouge">LOGOUT_REDIRECT_URL = 'home'</code> and create the below template, as the code expects:</p>

<div class="language-plaintext highlighter-rouge"><div class="highlight"><pre class="highlight"><code>&lt;!-- templates/registration/logged_out.html --&gt;
{% extends "_base.html" %}
{% block title %}Log Out{% endblock title %}
{% block content %}
&lt;h2&gt;You are logged out&lt;/h2&gt;
{% endblock content %}
</code></pre></div></div>

<p>This works great for our custom apps, but it replaces (overrides) the Admin logout page, because the Admin template has the same name: <code class="language-plaintext highlighter-rouge">contrib/admin/templates/registration/logged_out.html</code> <br />
This means that we have lost the Admin logout again, and now we have the reverse problem: a user logging out from the Admin app will see the different look and feel of our custom logout page.</p>

<p>(The Admin login was not replaced, because it exists in a special location: <code class="language-plaintext highlighter-rouge">contrib/admin/templates/admin/login.html</code>. This location was found by using the information in this <a href="https://stackoverflow.com/questions/19919547/where-can-i-find-the-source-file-of-admin-site-urls">article</a>.)</p>

<p>So what’s the actual solution??</p>

<p>Rename <code class="language-plaintext highlighter-rouge">registration/logged_out.html</code> to <code class="language-plaintext highlighter-rouge">registration/mylogout.html</code>
and change <code class="language-plaintext highlighter-rouge">config/urls.py</code> according to this <a href="https://stackoverflow.com/questions/59692899/using-loginview-and-logoutview-with-custom-templates]">article</a> as follows:</p>

<div class="language-plaintext highlighter-rouge"><div class="highlight"><pre class="highlight"><code># config/urls.py
from django.contrib.auth import views

urlpatterns = [
    path('admin/', admin.site.urls),

    path(
      'accounts/logout/',
      views.LogoutView.as_view(
        template_name='registration/mylogout.html',
        next_page=None),
      name='logout'),

    path('accounts/', include('django.contrib.auth.urls')),
    path('', include('pages.urls')),
]
</code></pre></div></div>

<p>Note that we specified our own logout URL first, effectively overriding the one in <code class="language-plaintext highlighter-rouge">django.contrib.auth.urls</code>.</p>

<p>Now we have the best of both worlds. The Admin app’s logout page continues to work, and our custom apps enjoy their own, dedicated logout page. Nice!</p>]]></content><author><name></name></author><category term="django" /><summary type="html"><![CDATA[As we discussed before, Django is a powerful framework. We have been using it to quickly develop reliable CRUD web apps that run smoothly and flawlessly. However, apart from creating our own apps and templates, we are also guilty of giving the Admin interface to end-users. Sometimes, we even combine our custom apps and the Admin app in a single project, and users of this project might have access to both types of apps. In these cases, we faced a rather unusual problem of having to provide two different logout pages: one should be custom and the other should be the Admin’s default. Finding how to do it took some time and experimentation, so if you are having the same problem, read on.]]></summary></entry><entry><title type="html">How do we maintain our codebase</title><link href="/github/2022/11/19/how-do-we-maintain-our-codebase.html" rel="alternate" type="text/html" title="How do we maintain our codebase" /><published>2022-11-19T13:21:59+00:00</published><updated>2022-11-19T13:21:59+00:00</updated><id>/github/2022/11/19/how-do-we-maintain-our-codebase</id><content type="html" xml:base="/github/2022/11/19/how-do-we-maintain-our-codebase.html"><![CDATA[<p>We really try to be cutting-edge with our IT stack. But we don’t stop there. After all, the end result of using the IT stack is the codebase, and this is our most important asset (besides people of course). So we take great care in maintaining it properly. Here are the 13 steps that we employ to achieve that.</p>

<h2 id="1-issue-tracking">1. Issue tracking</h2>
<p>Everything begins here, so this step is very important. Initially we were using plain-old email for issue tracking. We even implemented a mechanism for automatic ID creation per email message, so we could easily refer to a specific message later. However, email messages can’t be categorised easily. Besides that, email is used for so many other types of communication, thus it’s not reliable as an issue tracker.</p>

<p>Another option we tried was to use Jira, which covers all the necessary functionality. However, we ended up developing our own issue tracking system, for two reasons:</p>
<ul>
  <li>We can utilise our existing user base</li>
  <li>Everything can be stored in our own database</li>
</ul>

<p>Either way, the main concern here is to collect all information regarding a specific issue (messages and attachments) in a single place, and give it a unique ID. Every time someone wants us to fix a bug or build a new feature, they have to go through our issue tracking application. Having a good system ensures that all issues are carefully articulated and documented, and also provides statistical insights at the end of each year.</p>

<h2 id="2-specification-document">2. Specification document</h2>
<p>Bug fixing is usually straightforward, but in the case of new features (or obviously, new projects) we have to transform the correspondence submitted to the issue tracking system, into a proper specification document, to be used by the developers. This document should contain ample implementation details, including database design (my favourite part). When the document is ready, we submit it to the issue tracking system as well. Spec writing is an art form in itself, so we are always trying to get better at this.</p>

<h2 id="3-create-new-local-branch-on-local-development-machine">3. Create new local branch on local development machine</h2>
<p>When we finally have our issue and our spec, it’s time to open a new branch to work on. This can be named anything the developer likes, but usually we name it the same as the issue ID.</p>

<h2 id="4-development-and-testing-on-local-machine">4. Development and testing on local machine</h2>
<p>This is the meat of the process, obviously. We don’t have a QA department, so we try to bring together developers, architects and users, as often as possible, during the development stage.</p>

<h2 id="5-update-documentation">5. Update documentation</h2>
<p>Here is where we are trying to improve. We used to store documentation in our document management system, i.e. SharePoint. But current good practices (I try to avoid the term “best practices”) dictate that all documentation should reside in the project’s repository, and be updated along with the code. In our case, this includes the below four documents for each project:</p>

<ul>
  <li>User’s manual</li>
  <li>Technical document (architecture and code notes)</li>
  <li>API endpoint list (if applicable)</li>
  <li>README (installation instructions)</li>
</ul>

<p>We try to avoid binary formats. All documents should be text-based, so they can be tracked and versioned by git. In order to support images and formatting in the documents, we use open markup technologies (currently HTML, and in the future Markdown) so the documents can be rendered properly when needed.</p>

<h2 id="6-commit">6. Commit</h2>
<p>This is self-explanatory. We are just making sure to include the issue ID in each commit message, along with a short description. The only comment I would like to add here is something I recently read: “the commit is our principle unit of work. It deserves to be treated thoughtfully and with care.”</p>

<h2 id="7-git-push-to-new-remote-branch">7. Git push to new remote branch</h2>
<p>Self-explanatory as well. Just a quick note: when a “git push” of a new local branch is executed, a new remote branch is created automatically (provided that the developer has permission to do so).</p>

<h2 id="8-create-pull-request">8. Create pull request</h2>
<p>This is important. It signifies that the developer is confident for his work, and is ready to submit it for code review. Again we include the issue ID in this step, so we can easily refer to the respective issue later.</p>

<h2 id="9-merge-pull-request">9. Merge pull request</h2>
<p>This is the code review step, usually performed by the team leader or software architect (that would be me, in most cases). If all the previous steps have been performed diligently, then this step is mostly a formality.</p>

<h2 id="10-delete-new-remote-branch">10. Delete new remote branch</h2>
<p>After merging the pull request, the new remote branch can be safely deleted. Github offers this functionality by default. In the end, you will have your new commits plus one more (named “merge…”) on the remote main branch.</p>

<h2 id="11-git-checkout-main-and-git-pull-on-local-machine">11. Git checkout main and git pull on local machine</h2>
<p>This pulls all new commits, so there’s no need for “git merge”.</p>

<h2 id="12-delete-new-local-branch-on-local-machine">12. Delete new local branch on local machine</h2>
<p>At this stage, the new local branch can be safely deleted as well.</p>

<h2 id="13-deployment-git-pull-on-server">13. Deployment: git pull on server</h2>
<p>This is the 13th step, but hopefully it’s not bad luck. We just perform a “git pul” on the deployment server, and normally the new changes are automatically read, without needing to restart the application. This holds true for both Django and React apps.</p>

<p>Maintaining a good codebase is key in the success of a development department. Following the above steps, and at the same time improving the process continuously, we are hoping to be in a good position for many years to come.</p>]]></content><author><name></name></author><category term="github" /><summary type="html"><![CDATA[We really try to be cutting-edge with our IT stack. But we don’t stop there. After all, the end result of using the IT stack is the codebase, and this is our most important asset (besides people of course). So we take great care in maintaining it properly. Here are the 13 steps that we employ to achieve that.]]></summary></entry><entry><title type="html">How did we make the transition from desktop to web</title><link href="/sharepoint/2022/11/18/how-did-we-make-transition-from-desktop-web.html" rel="alternate" type="text/html" title="How did we make the transition from desktop to web" /><published>2022-11-18T13:21:59+00:00</published><updated>2022-11-18T13:21:59+00:00</updated><id>/sharepoint/2022/11/18/how-did-we-make-transition-from-desktop-web</id><content type="html" xml:base="/sharepoint/2022/11/18/how-did-we-make-transition-from-desktop-web.html"><![CDATA[<p>At Ionia Management, we try to be cutting-edge with our IT stack. This isn’t always straightforward in the shipping sector. So how did we go about it?</p>

<p>The first step was making our office web-based. Ionia has always been a Microsoft shop, so the choice was obvious: move everything to SharePoint.</p>

<p>We use SharePoint for file storage (OneDrive), online collaboration (Office 365), approvals, workflows, and simple data storage (lists and document libraries). But most importantly, we use SharePoint as a placeholder and starting point for all our custom software. This presupposes that all this software is web-based.</p>

<p>So how did we achieve that? Well, for reporting needs we already had Power BI (see this excellent <a href="https://www.linkedin.com/pulse/how-bi-tools-helped-us-reduce-forwarding-costs-nicolas-otheitis/">post</a> by a former colleague). This means that reporting was almost ready. Our SQL Server databases are still on premises (we are not so bold yet to move them to the cloud), so we employed the Gateway mechanism to retrieve necessary data for our online Power BI reports. We also doubled down on our hiring of Power BI developers, using mostly UpWork to reach worldwide talent.</p>

<p>For simple applications, we use either Microsoft’s own solutions (for example, Planner) or we build our own Power Apps for custom needs. Power Apps are low-code, and they integrate seamlessly with SharePoint lists for data storage.</p>

<p>And now getting to the meat of things. We had a series of legacy desktop apps that needed to be ported to web. Not easy!</p>

<p>The first step was to move our codebase to the cloud. The solution is obvious: GitHub. We created an <a href="https://github.com/ioniaman">organisational account</a>, plus various repositories for our projects, some private and others public. We educated and pushed in-house and external developers to use git.</p>

<p>Second step was to choose our new development stack. Web apps need a backend and a frontend, so we had to make a careful choice for both.</p>

<p>For the former, the most obvious choice was .NET which would make the porting of our current desktop apps easier. And indeed we did that successfully. But we didn’t stay there. Having used Python for various scripting needs across our systems, we also decided to give Django a try. It has been <a href="https://panelbear.com/blog/tech-stack/">said</a> that Django is like a superpower for solo developers or small teams, and this is true. It enables you to build a backend easily, gives you the ability to offer an API quickly if needed, and even provides a professional GUI out of the box, in the form of the Admin Panel.</p>

<p>For the frontend, we initially went with Razor Pages thinking that we will enjoy easier integration with our .NET backends. While this is true, we later found that the React framework is more powerful and much more popular with developers. So we are a React shop now and our apps look great!</p>

<p>The results of all the above have been very nice. When our users log into their workstations every morning, they are presented with our SharePoint intranet page and they have everything at their fingertips: files, data, reports and applications.</p>

<p>Things haven’t been easy and there is still much to do. But we are always learning and evolving, and we fully intend to advance even further. Oh, and if any of the above sounds interesting, we are always hiring!</p>]]></content><author><name></name></author><category term="sharepoint" /><summary type="html"><![CDATA[At Ionia Management, we try to be cutting-edge with our IT stack. This isn’t always straightforward in the shipping sector. So how did we go about it?]]></summary></entry></feed>